A note from the authors: Some of the information and instructions in this book are now out of date because of changes to Hugo and the blogdown package. If you have suggestions for improving this book, please file an issue in our GitHub repository. Thanks for your patience while we work to update the book, and please stay tuned for the revised version!
In the meantime, you can find an introduction to the changes and new features in the v1.0 release blog post and this "Up & running with blogdown in 2021" blog post.
— Yihui, Amber, & Alison
1.2 A quick example
在本节中,我们的目标是让您以最少的时间和最少的摩擦从没有网站到建立一个基本的 blogdown 网站。我们将使用 blogdown 包使用的默认主题简要介绍一个可以工作但简单的网站的开发过程。
本部分旨在提供适合初学者的工作流程。在后面的部分中,我们将介绍不同的工作流程,并深入探讨高级 blogdown 功能、Hugo 主题、Hugo 静态站点生成器、版本控制和部署选项等细节。
1.2.1 Prerequisites
为了让这个示例真正快速,我们假设您正在使用 RStudio IDE,并将依赖一些帮助 blogdown 用户的内置功能。1
我们还假设您已遵循 Section 1.1 中的安装说明。
1.2.2 Create project
新的 blogdown 网站项目的最佳创建方式是在 RStudio project 中。创建的快速方法是使用 RStudio New Project 菜单 (File -> New Project -> New Directory) (see Figure 1.1 and 1.2)。
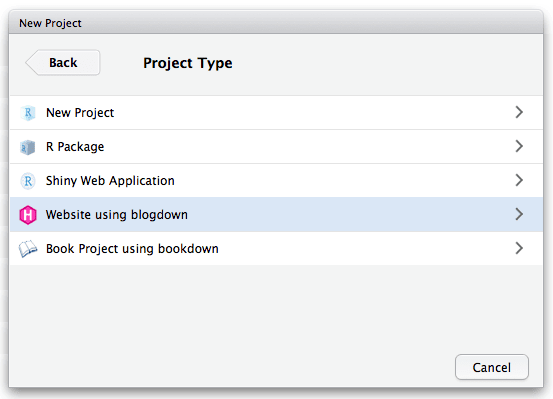
FIGURE 1.1: Create a new website project in RStudio.
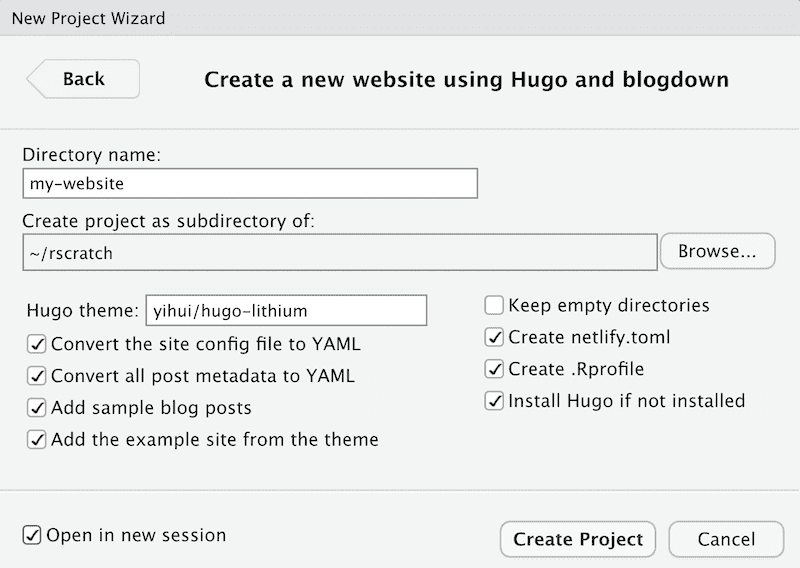
FIGURE 1.2: Create a website project based on blogdown.
单击 “Create Project”。然后,项目向导运行一个函数,通过执行以下步骤为您创建一个新站点:
- 为网站创建并打开一个新的 RStudio Project;
- 下载并安装带有示例站点的默认主题 (called
hugo-lithium); - 添加一个示例
.Rmdpost; - 创建一个
netlify.toml文件来帮助您将站点部署到 Netlify,,并且 - 创建一个
.Rprofile文件来设置您的 blogdown 选项(其中一些选项已为您设置)。
如果您没有使用 RStudio,您可以创建一个新的空目录,并在 R 控制台中调用该目录中的 new_site() 函数来创建新的站点项目:
您现在应该在站点项目下看到一堆目录和文件。该项目将包含以下文件:
config.yaml: Hugo and theme configuration file..Rprofile: File to set up your blogdown options.netlify.toml: File to set up your Netlify options.content/: Website source files to edit and add, such as blog posts.themes/: Hugo theme assets like HTML layout files and CSS, etc. Do not edit!
完成所有这些后,您的新网站就准备好了!
1.2.3 Serve site
在我们解释这些新目录和文件之前,让我们使用我们的第一个 blogdown 函数。这是一个重要的功能,并且通常是您打开一个 blogdown 项目以启动网站的本地预览时使用的第一个功能。
您可以从控制台使用 run blogdown::serve_site(),或单击 RStudio 插件 “Serve Site” (see Figure 1.3)。
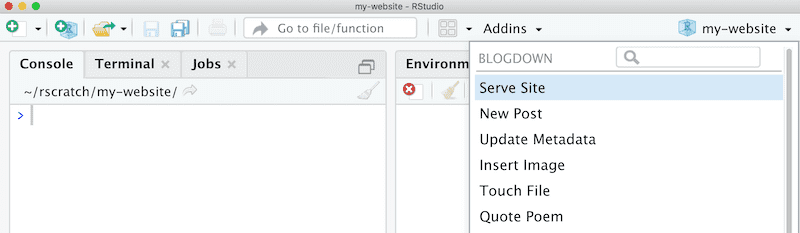
FIGURE 1.3: Use the blogdown addin to serve the site.
然后您应该看到如 Figure 1.4 所示的内容。
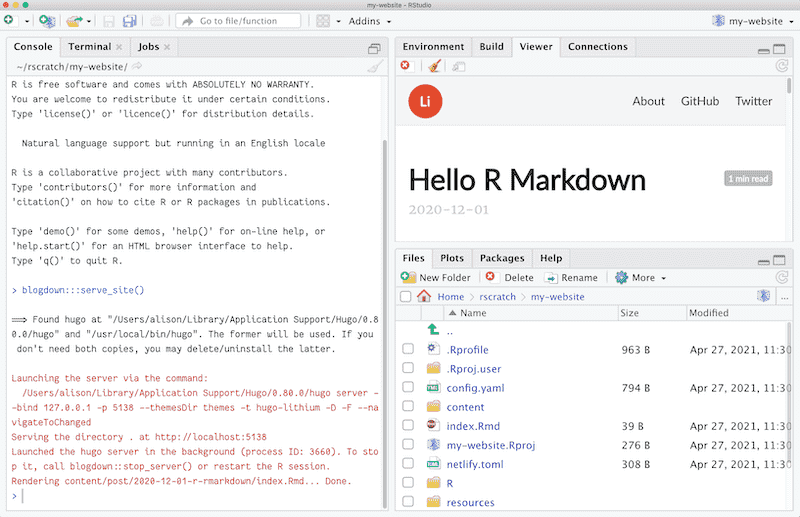
FIGURE 1.4: Serving the site in RStudio.
Serving the site 执行了以下操作:
- 启动本地 Hugo server 来帮助您预览网站,并且
- 将示例
.Rmdpost Knitted 为一个.html页面。您可以从打印到控制台的进度消息中看到这一点:Rendering content/post/2020-12-01-r-rmarkdown/index.Rmd... Done.
如果您想在 Web 浏览器中本地预览网站,可以单击 RStudio viewer 窗格顶部的 “Show in new window” 图标(扫帚图标的右侧)。您可以在 Figure 1.5 中看到该网站的外观。
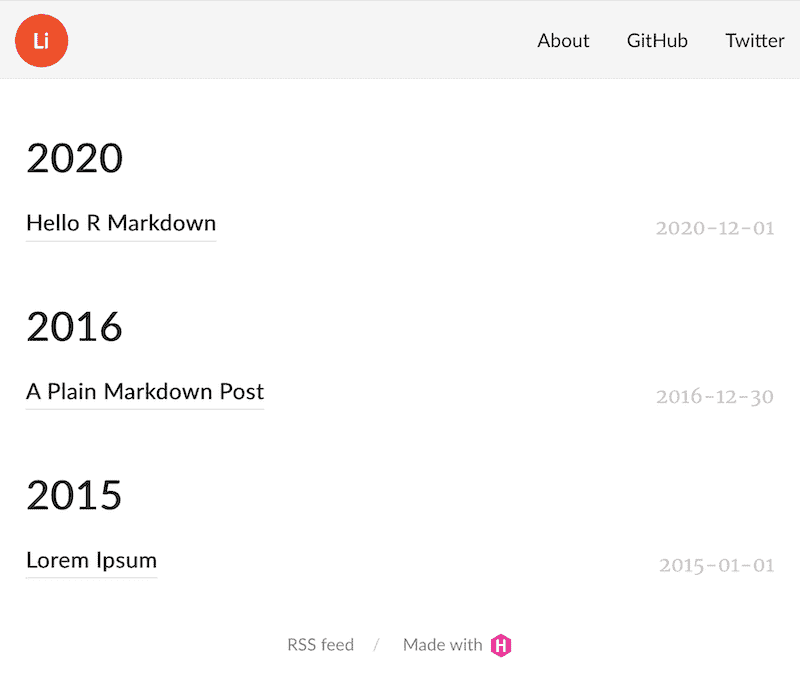
FIGURE 1.5: The homepage of the default new site.
让我们介绍一下您刚刚使用的一项重要且有用的技术:LiveReload.。使用 LiveReload 为您的网站提供服务,这意味着当您修改网站的任何源文件并保存时,您的网站2 将自动重建并重新加载到您的网络浏览器3中。基本上,一旦您在网络浏览器中启动网站,您就不再需要显式地重建它。您所需要做的就是编辑源文件(例如 R Markdown 文档)并保存它们。无需单击任何按钮或运行任何命令。LiveReload 是通过 blogdown::serve_site() 和 Hugo 实现的,每个工作会话只需使用一次。
1.2.4 Edit content
现在让我们看看 LiveReload 的实际应用。在文件窗格中,导航到 content/ 文件夹内。该文件夹是您网站的所有内容所在的位置。查找并打开文件 content/post/2020-12-01-r-rmarkdown/index.Rmd。这是一个示例 R Markdown post,在您设置新站点时默认由 blogdown 添加。
当您打开该文件时,您会注意到顶部有一个 YAML 块,其中包含熟悉的 metadata 如 title 和 author 等,然后是 YAML 下面的代码块和叙述文本,就像典型的 R Markdown 文件一样。
让我们编辑这个 index.Rmd post。这篇 post 是一个 Hugo page bundle。每个 post 都有自己的 bundle 或文件夹。post bundle 内是您的静态帖子特定文件(例如图像和 .csv 数据文件)应该存放的位置。
content/
├── post
│   ├── 2020-12-01-r-rmarkdown
│   │   ├── index.html <- blogdown knitted this for you
│   │   └── index.Rmd
│   ├── 2015-01-01-lorem-ipsum
│   └── 2016-12-30-hello-markdown
blogdown 的默认行为是在您为网站提供服务时自动 knit 以前未 knitted 过的 posts,因此该文件已经 knitted 过 — 这就是为什么您可以在本地预览中看到它。
继续向该文件添加 R 代码块,例如:
```{r}
summary(Orange)
```如果您通过此编辑保存文件,blogdown 将在保存时 re-knit 文件,一旦 LiveReload 启动,您的网站预览应在几秒钟后更新。
再试一次!添加另一个 R 代码块,例如:
```{r echo=FALSE}
library(ggplot2)
ggplot(Orange, aes(x = age,
                   y = circumference,
                   color = Tree)) +
  geom_point() +
  geom_line() +
  guides(color = "none") +
  theme_bw()
```
您应该会看到一个 blog post 如 Figure 1.6 所示。

FIGURE 1.6: Adding new R code to an .Rmd post.
1.2.5 When in doubt, run blogdown::check_site()
网站无法按预期工作的可能原因有很多。例如,您可能错误配置了网站配置文件(例如 config.yaml)中的某些选项,或者将一个 post 标记为 draft 但忘记在发布网站之前取消标记。这些错误很容易犯,而且通常很难诊断。
幸运的是,函数 blogdown::check_site() 可以在您的网站项目中运行一系列检查,以帮助您识别常见问题。它还提供了有关如何解决这些问题的提示。它适用于您的交互式工作会话。您将看到哪些文件被检查,哪些检查成功,当检查需要您注意时,blogdown 将提供 [TODO] 项目,如下所示:
-----------------------------------------------------------
○ A successful check looks like this.
● [TODO] A check that needs your attention looks like this.
| Let's check out your blogdown site!
-----------------------------------------------------------
― Checking config.yaml
| Checking "baseURL" setting for Hugo...
○ Found baseURL = "https://yihui.org/"; nothing to do here!
....
― Check complete: config.yaml

― Checking .gitignore
| Checking for items to remove...
○ Nothing to see here - found no items to remove.
| Checking for items to change...
● [TODO] Change items in .gitignore: public -> /public,
  blogdown -> /blogdown
| Checking for items you can safely ignore...
● [TODO] You can safely add to .gitignore: .DS_Store, Thumbs.db
....
― Check complete: .gitignore

― Checking Hugo
| Checking Hugo version...
○ Found 8 versions of Hugo. You are using Hugo 0.82.1.
| Checking .Rprofile for Hugo version used by blogdown...
| Hugo version not set in .Rprofile.
● [TODO] Set options(blogdown.hugo.version = "0.82.1") in .Rprofile
  and restart R.
― Check complete: Hugo

― Checking netlify.toml...
○ Found HUGO_VERSION = 0.25.1 in [build] context of netlify.toml.
....
― Check complete: netlify.toml

― Checking content files
| Checking for validity of YAML metadata in posts...
○ All YAML metadata appears to be syntactically valid.
| Checking for previewed content that will not be published...
○ Found 0 files with future publish dates.
● [TODO] Found 2 files marked as drafts. To un-draft, run:

  blogdown::edit_draft(c(
  "content/foo.md",
  "content/bar.md"
  ))

  and change a file's YAML from 'draft: true' to 'draft: false'.
....
― Check complete: Content
1.2.6 Configure site
我们刚刚向您展示了如何开始将 .Rmd 内容添加到您的网站。但是,当您第一次设置网站时,您将需要编辑一些其他文件来个性化您的网站。config.yaml 文件存储 Hugo 和 Hugo 主题的网站配置。您通常只会在初始网站设置期间编辑此文件。
例如,您可能会在 config.yaml 中看到类似以下的配置:
baseurl: /
title: A Hugo website
theme: hugo-lithium
ignoreFiles:
  - \.Rmd$
  - \.Rmarkdown$
  - _cache$
  - \.knit\.md$
  - \.utf8\.md$
permalinks:
  post: /:year/:month/:day/:slug/
menu:
  main:
    - name: About
      url: /about/
    - name: GitHub
      url: https://github.com/rstudio/blogdown
    - name: Twitter
url: https://twitter.com/rstudio您可以更改网站标题,例如:title: "My own cool website",并更新 GitHub 和 Twitter URLs。
1.2.7 Summary
您现在已经了解了 Hugo-based 网站的三个最基本的概念:
如何使用
blogdown::serve_site()或 RStudio 插件 “Serve Site” 在本地预览 Hugo 站点。如何编辑 Hugo 配置文件
config.yaml来指定站点和主题的全局设置。如何编辑
content/目录中的内容,您可以在其中为 posts 和 pages 编写 R Markdown 或 Markdown 源文件。在默认站点的content/下,您可以看到about.md和包含一些帖子的post/目录。内容目录的组织由您决定。您可以在那里拥有任意文件和目录,具体取决于您想要的网站结构。
此处的说明依赖于最新的 RStudio IDE 版本 v1.4.1106。您可以从 https://posit.co/download/rstudio-desktop/ 下载所有 RStudio 官方版本。↩︎
在您设置要部署的网站之前,LiveReload 仅更新网站的 local 版本。此版本仅您可见。为了使您的网站可搜索、可发现并在互联网上运行,您需要将网站文件上传到网站构建器。有关详细信息,请参阅 Chapter 3。↩︎
您也可以将 RStudio Viewer 视为 Web 浏览器。↩︎