A note from the authors: Some of the information and instructions in this book are now out of date because of changes to Hugo and the blogdown package. If you have suggestions for improving this book, please file an issue in our GitHub repository. Thanks for your patience while we work to update the book, and please stay tuned for the revised version!
In the meantime, you can find an introduction to the changes and new features in the v1.0 release blog post and this "Up & running with blogdown in 2021" blog post.
— Yihui, Amber, & Alison
1.4 RStudio IDE
有一些基本的 RStudio 插件可以让您轻松编辑和预览网站,您可以在 RStudio 工具栏上的 “Addins” 菜单中找到它们:
“Serve Site”:此插件调用
blogdown::serve_site()使用 LiveReload 技术在本地持续为您的网站提供服务,以便您可以实时预览网站。您可以在预览时继续编辑网站的材料。“New Post”:此插件提供了一个对话框,供您输入博客文章的 metadata,包括标题、作者、日期等。示例见 Figure 1.7。这个插件实际上在底层调用了函数
blogdown::new_post(),但会自动执行一些操作:当您输入 post 标题时,它会为您生成一个文件名,如果您不喜欢自动生成的文件名,您可以对其进行编辑。事实上,你也可以使用这个插件在
content/下的任何目录下创建普通页面。例如,如果要添加简历页面,可以将文件名从默认的post/YYYY-mm-dd-resume.md更改为resume.md。您可以从 Shiny 提供的日历小部件中选择日期。4
它将扫描现有 posts 的类别和标签,因此当您想要输入类别或标签时,您可以从下拉菜单中选择它们,或者创建新的类别或标签。
新 post 创建后会自动打开,您可以立即开始撰写内容。
“Update Metadata”: 此插件允许您更新当前打开的 post 的 YAML metadata。示例见 Figure 1.8。该插件的主要优点是您可以从下拉菜单中选择类别和标签,而不必记住它们。
“Insert Image”: 此插件允许您将计算机中的任何图像插入到当前打开的 post 中。5 Figure 1.9 显示了该插件的外观。此插件将图像复制到 post 文件的最终位置,并添加 Markdown/HTML 代码来嵌入图像。您可以指定图像的宽度和高度以及替代文本。图片上传后,插件将显示最终的图片文件路径。如有必要,您可以编辑路径。如果图像已经存在,插件会询问您是否要覆盖它,如 Figure 1.10 所示:如有疑问,请更改 “Target file path” 文本输入中的名称,以避免与您之前插入的图像发生冲突。
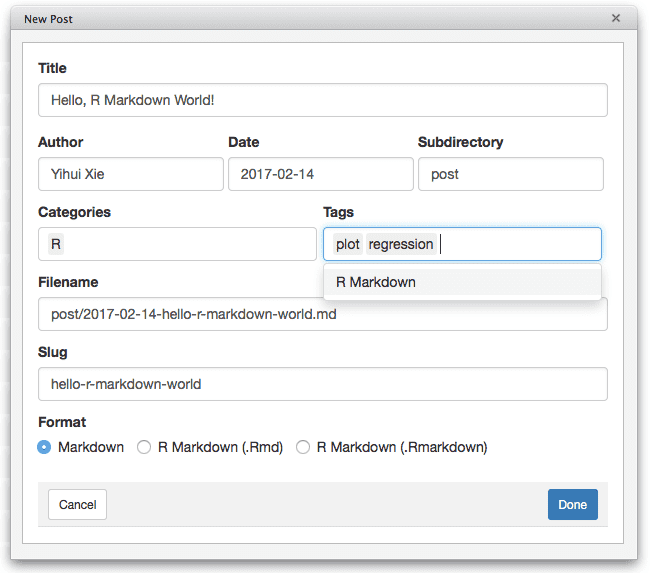
FIGURE 1.7: Create a new post using the RStudio addin.
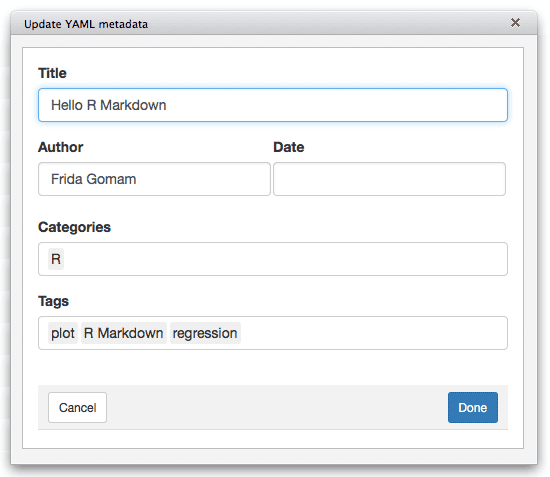
FIGURE 1.8: Update the metadata of an existing post using the RStudio addin.
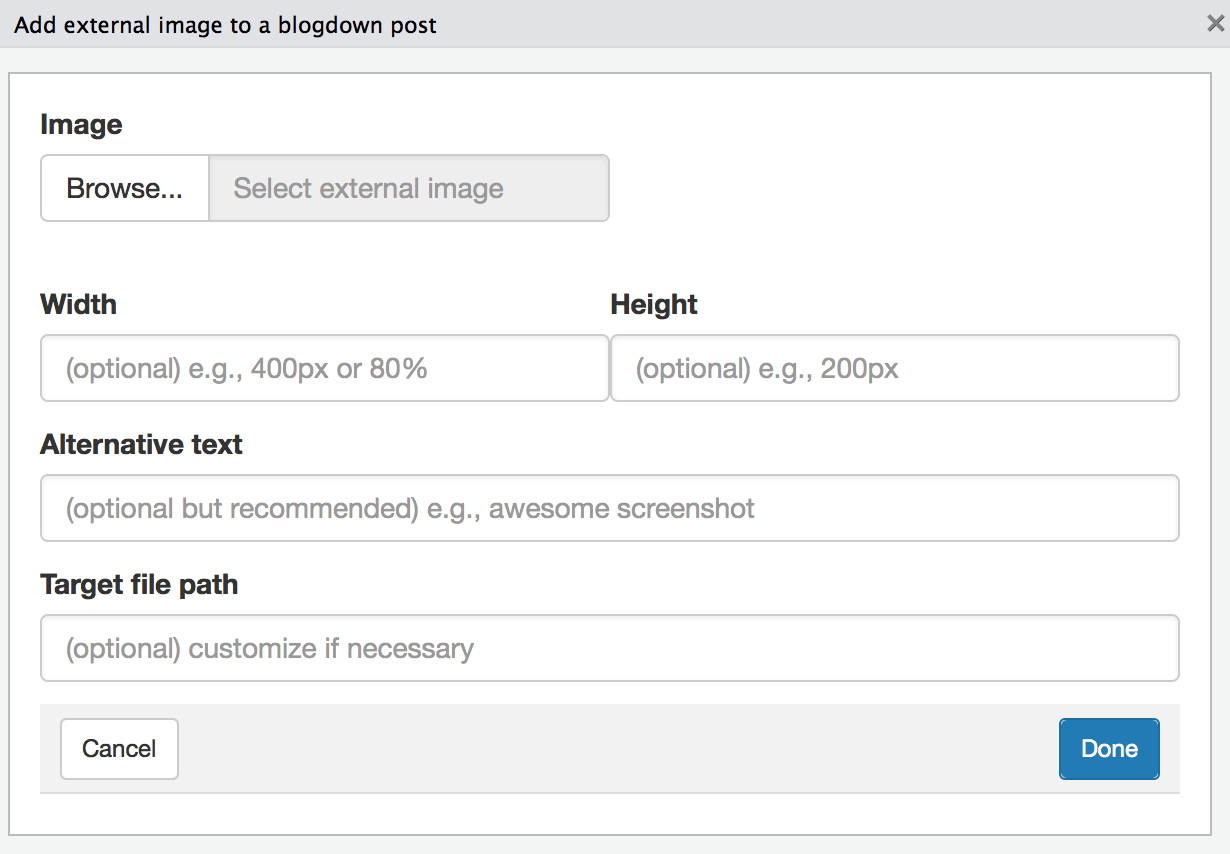
FIGURE 1.9: Insert an image to an existing post using the RStudio addin.
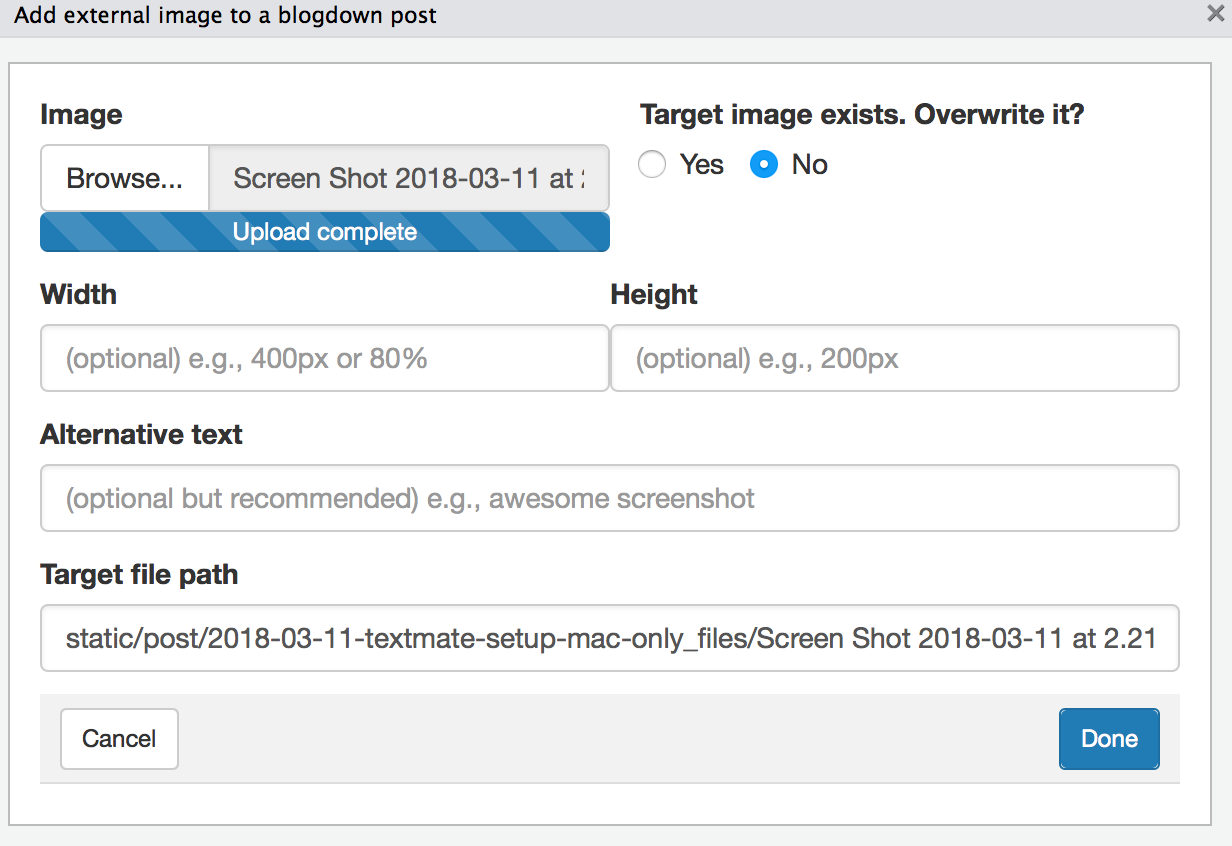
FIGURE 1.10: Overwrite the image you are inserting in your blog post.
使用这些插件,在设置网站后,您应该很少需要手动运行任何 R 命令,因为由于 LiveReload 功能,每当您创建新帖子或修改现有帖子时,您的所有帖子都会自动编译。
如果您的网站是第一次使用函数 blogdown::new_site() 而不是 RStudio 菜单(见 Figure 1.1 和 1.2)创建的,您可以退出 RStudio 并再次打开项目。如果您进入菜单 Tools -> Project Options,您的项目类型应该是 “Website”,如 Figure 1.11 所示。
然后您将在 RStudio 中看到一个名为 “Build” 的窗格,并且有一个 “Build Website” 按钮。当您单击此按钮时,RStudio 将调用 blogdown::build_site() 来构建网站。这会自动在 public/ 目录下生成文件。6
我们强烈建议您在 RStudio 项目选项中取消选中 “Preview site after building” 选项(Figure 1.11)。7 您还可以取消选中 “Re-knit current preview when supporting files change” 选项,因为此选项在你调用 serve_site() 之后并不是很有用。
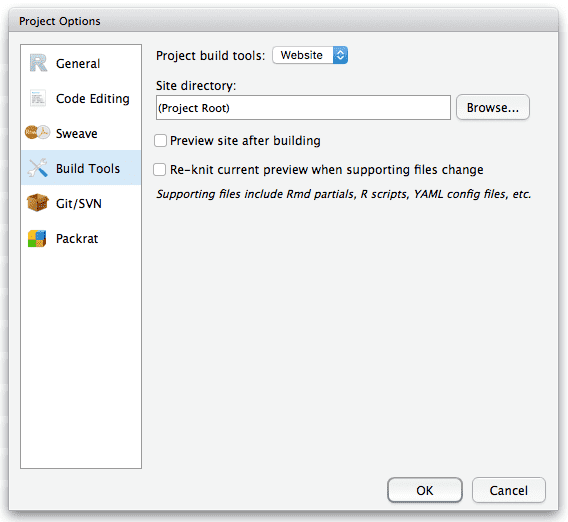
FIGURE 1.11: RStudio project options.
Shiny 是一个 R 包,用于使用 R 构建交互式 Web apps。使用此插件,日历小部件允许您按月查看交互式日历以选择日期。这是 Shiny 的简单使用,但您可以在这里阅读有关 Shiny 应用程序的更多信息:https://shiny.rstudio.com。↩︎
查看 https://lcolladotor.github.io/2018/03/07/blogdown-insert-image-addin 以获取更深入的解释以及如何在不使用此插件的情况下插入图像。↩︎
或者您的发布目录所在的任何位置。默认是
public/,但可以通过在config.yaml文件中指定字段publishDir: "myNewDirectory"来更改。↩︎如果您想知道为什么:除非您在
config.toml中将选项relativeurls设置为true,否则需要 Web 服务器在本地预览网站,否则即使您可以在 RStudio Viewer 中看到网站的主页,大多数链接都像这些指向 CSS 和 JavaScript 文件的链接不太可能起作用。当 RStudio Viewer 向您显示预览时,它实际上并没有启动 Web 服务器。↩︎